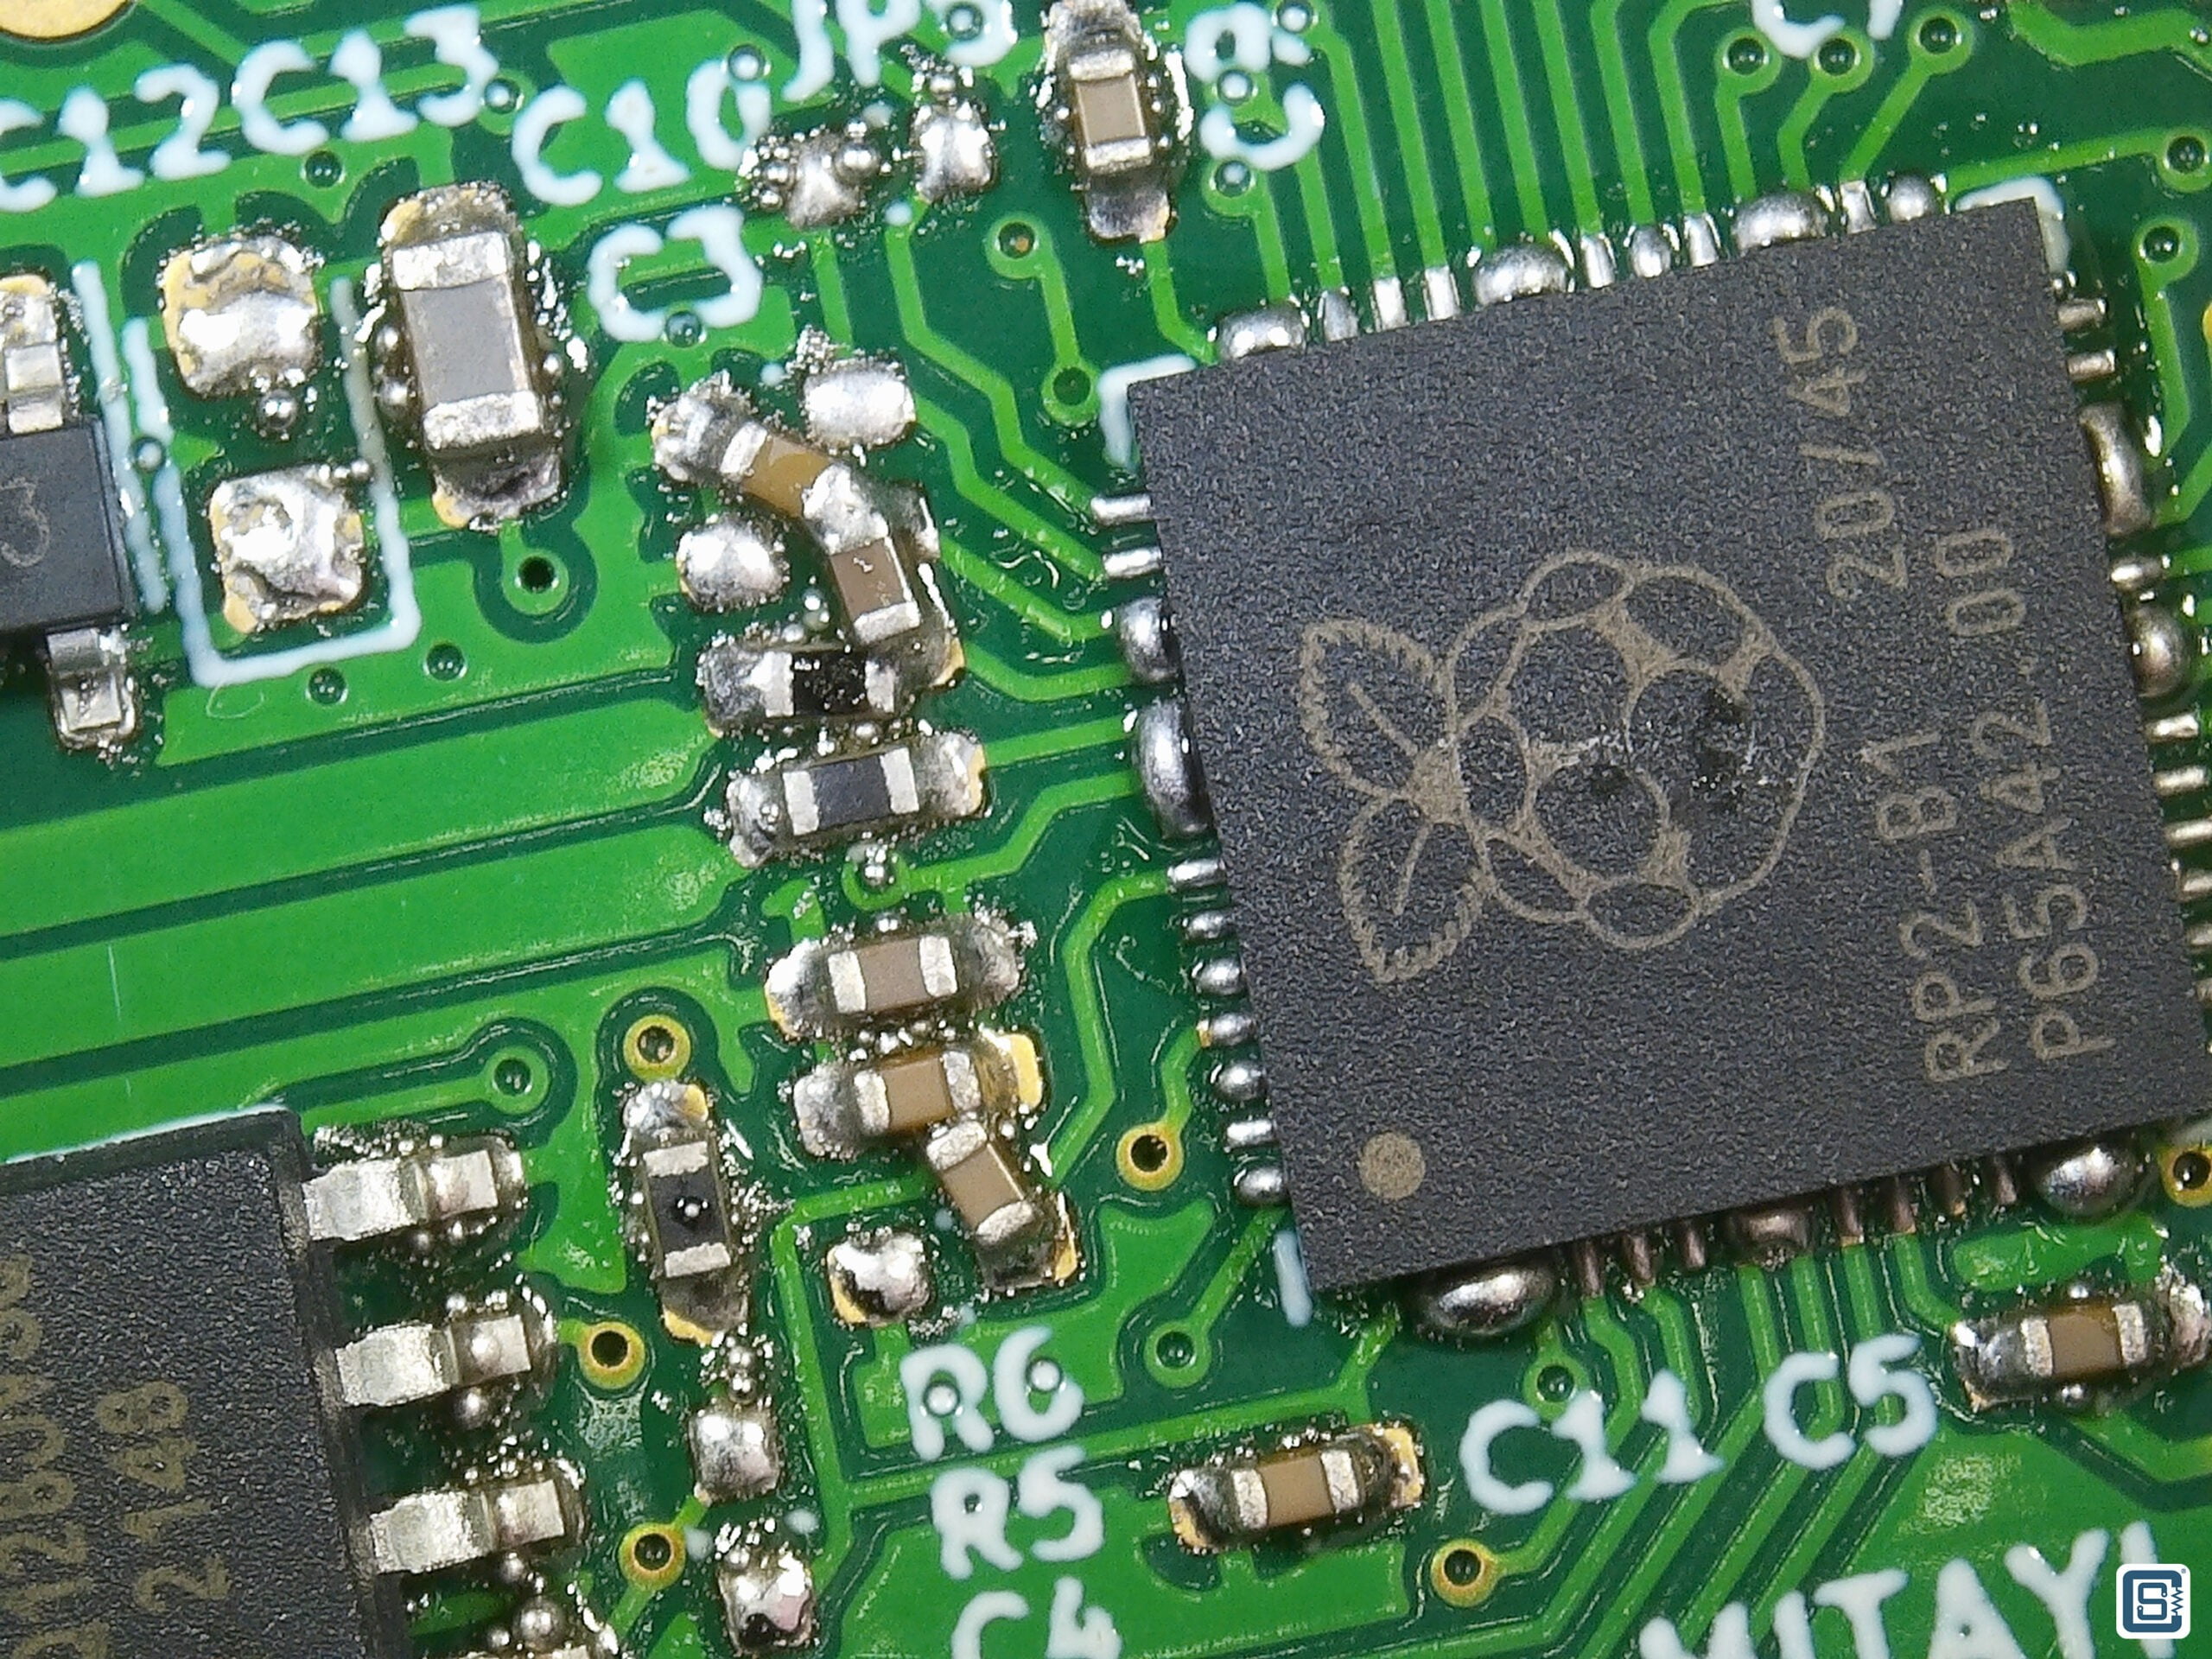
Raspberry Pi is the name of a series of single-board computers made by the Raspberry Pi Foundation, a UK charity that aims to educate people in computing and create easier access to computing education. Since 2012 the name Raspberry Pi stuck around for single board computer which runs on Linux. But things changed in January 2021, where the Raspberry Pi Foundation launched there first in house Arm cortex M0+ microcontroller RP2040. It was huge success and everyone was and everyone was over it.
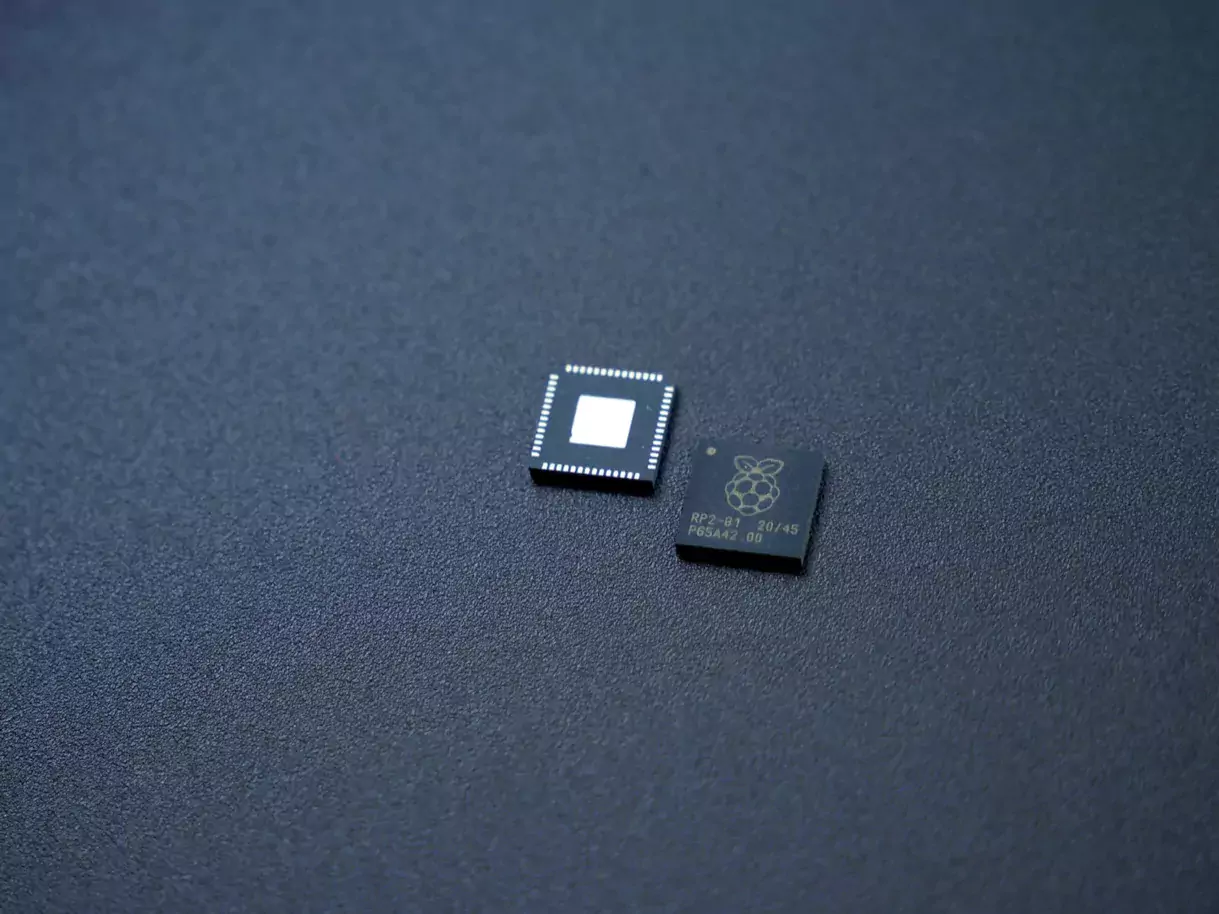
RP2040
For a beginner in the electronics world or a researcher/designer/developer undergoing an embedded development, using a microcontroller directly with help of datasheet to design something would be tremendously difficult. So companies come up with various development board / kit which would make things easier to learn and experiment. Similarly, Raspberry pi have there own development board called Raspberry Pi Pico.
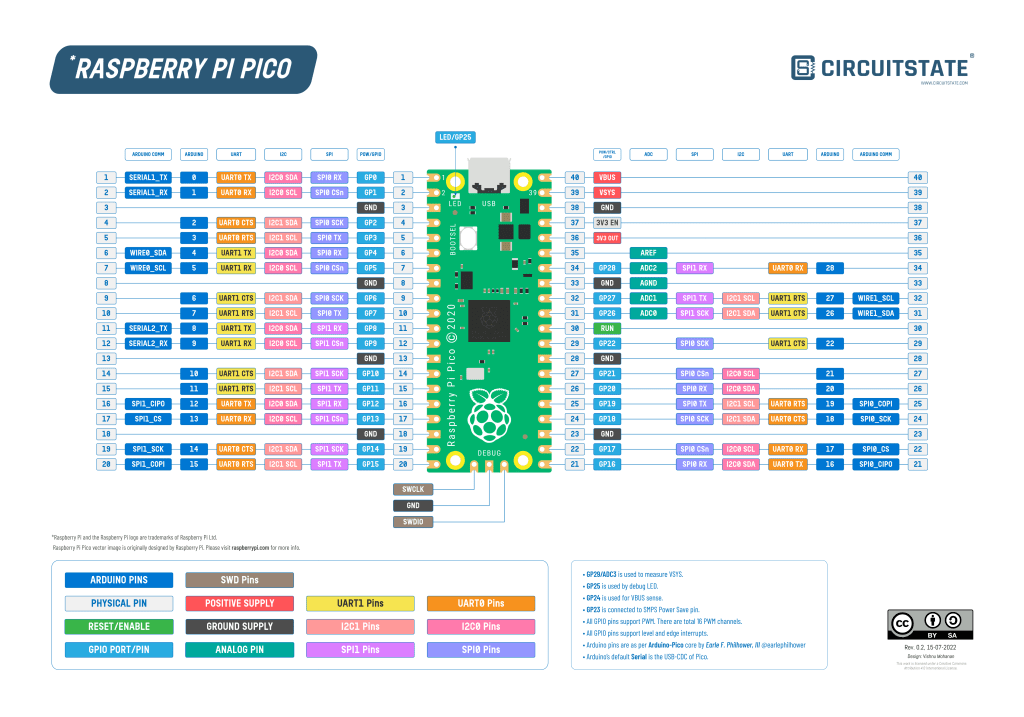
Raspberry Pi Pico
Raspberry Pi Pico specifications
- RP2040 microcontroller chip designed by Raspberry Pi in the United Kingdom
- Dual-core ARM Cortex-M0+ processor, flexible clock running up to 133MHz
- 264kB of SRAM, and 2MB of on-board flash storage
- Castellated module allows soldering direct to carrier boards
- USB 1.1 Host and Device support
- Low-power sleep and dormant modes
- Drag & drop programming using mass storage over USB
- 26 multifunction GPIO pins
- 2× SPI, 2× I2C, 2× UART, 3× 12-bit ADC, 16× controllable PWM channels
- Accurate clock and timer on-chip
- Temperature sensor
- Fast floating-point libraries in ROM
- 8× Programmable IO (PIO) state machines for custom peripheral support
Unlike Arduino development board like UNO, NANO and Pro Mini the Raspberry Pi Pico isn’t exactly opensource, even though most of the information is available about the board it’s not easy to just download the Gerber file and manufacture it or clone the board. To sort this inconvenience (Obviously for a very small audience) Vishnu Mohanan from CIRCUITSTATE decided to build his own clone of the Raspberry Pi Pico which is completely open source, From Schematic -> PCB Layout -> Gerber -> BOM -> Build Instructions!
Where did the Inspiration Come From?
Most people mistakenly take Raspberry Pi products as open source just because of the excellent publicly available documentation and the sheer amount of user using them, but Raspberry Pi Foundation is not completely open source (neither the Raspberry Pi 3 / 4 nor the Raspberry Pi Pico). That’s one of the reason why there is not a single clone of Raspberry Pi boards unlike the Arduino boards.
What if as a learner we get access to a complete open source microcontroller development board and also with added improvements? This trends is most noticeable on Arduino board, where people with passion build lots of variant’s of the same board with lot and lots of features.
This is where MITAYI comes into picture, a potential Gollum’s Ring (Hobbit).
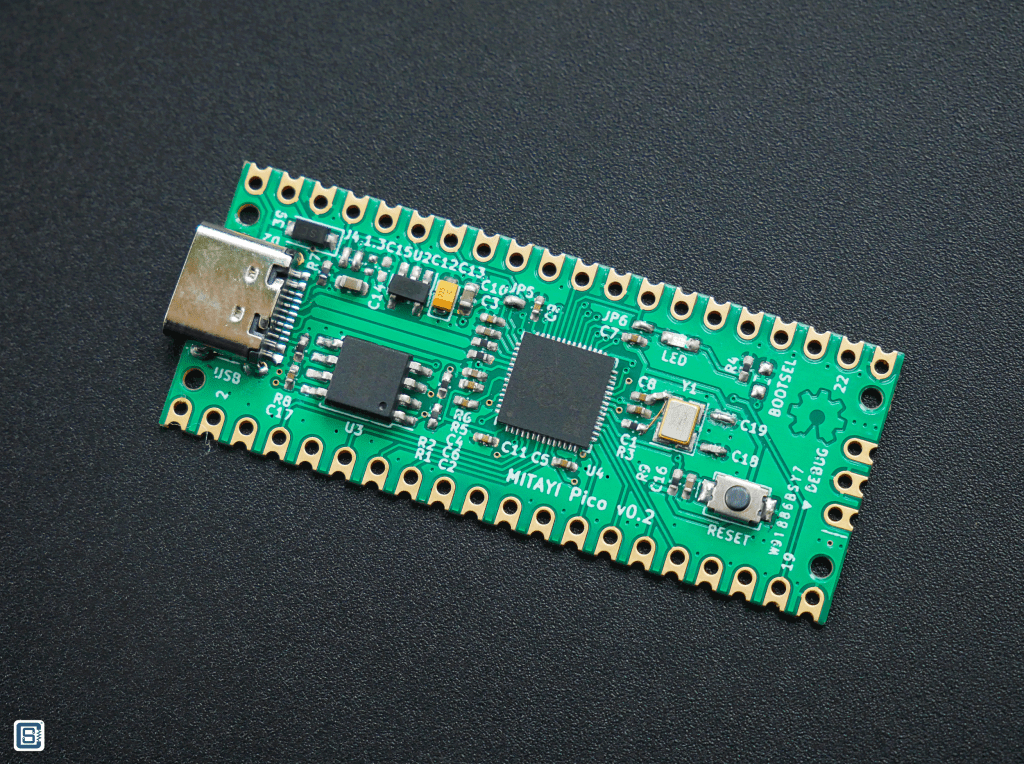
MITAYI Pico v0.2
MITAYI: The Name
Giving the board an Indian flavour, Vishnu named it Mitayi. It is a Malayalam word മിഠായി (IPA-EN: miṭhāyi) which translates to “candy”. Vishnu inspired this idea from various naming convention like most noticeable on Android series – Jellybean, KitKat, Lollipop, Marshmallow, etc. So he wanted to make a Malayali + Indian taste for the RP2040 boards with the name Mitayi.
Mitayi
Mitayi boards will be exclusively based on the RP2040 microcontroller from Raspberry Pi. Mitayi Pico will be the first one in this series. Following it will come the Mitayi Nano, Mitayi Micro, Mitayi Stamp, and more. While the Mitayi boards are exclusively based on the RP2040 microcontroller from Raspberry Pi, the Mitayi Pico offers enhanced features than Raspberry Pico.
The differences as highlighted here:
| Feature | Mitayi Pico r0.2 | Raspberry Pi Pico |
|---|---|---|
| USB | Micro USB or Type-C USB | Only Micro USB |
| Flash Memory | 16MB, SOIC-8 package | 2MB, USON-8 |
| Reset Button | Yes | No |
| Bootsel Button | No (pad only) | Yes |
| GPIO Pins | Breaks out all GPIO | Does not break out all pins |
| Voltage Regulator | Dual Linear 500mA LDO and 1A AMS1117 | 800 mA buck-boost switching regulator |
| Component Silkscreen Reference | Yes | No |
| Smallest component size | 0402 | 0201 |
| Completely Open-source? | Yes | No |
Designing and Development
All the Mitayi boards currently available or under pre-release stage are open source. Thus their designs are easily accessible on Github. Also the board is designed using open source EDA tool KiCad, version 6 for very easy access.
Laying Out the Schematics of the Board:
The Mityai design mostly align with the official Pico in terms of their schematics. However, few design references were picked from Shawn Hymel’s Pico Debugger Shoe. Further, they have made sure to maintain its original form factor even with design modifications so that it maintains compatibility with Pi Pico based boards.
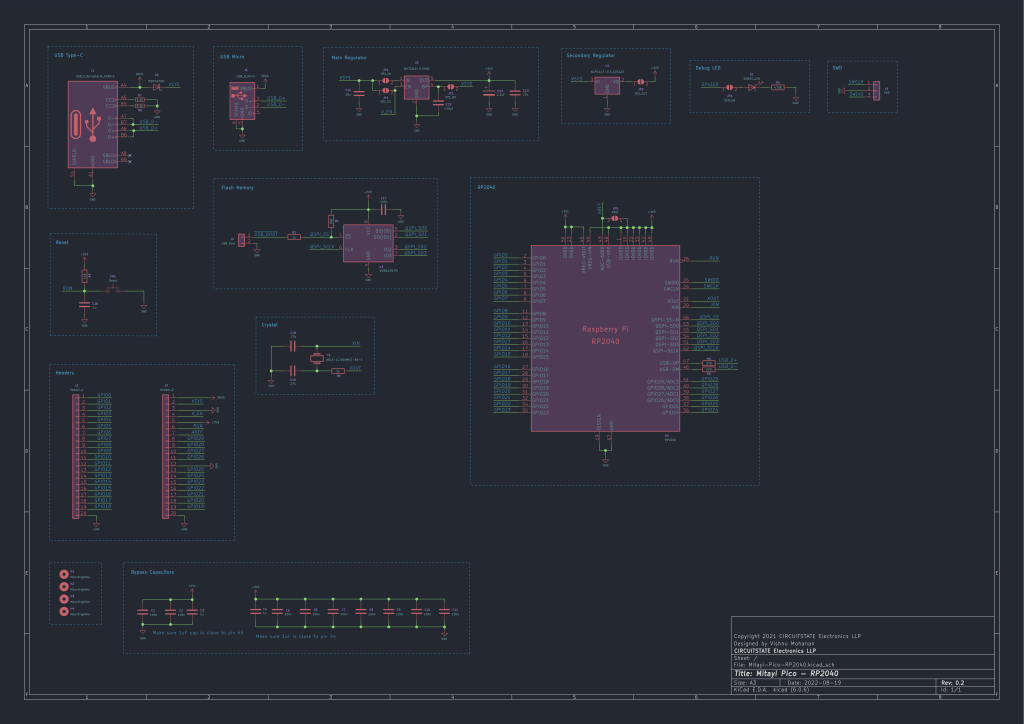
Mityai Schematics
As we the whole board is build around RP2040, there are some various interesting choice during the design stage. The flash memory used is the W25Q128JVSSIQ which will help in programming the RP2040 as it does not a flash memory of it’s own. Now to keep the dev board more in trend this board as both Micro USB and Type-C USB receptacle options which is very interesting and we’ll discuss more on that in PCB Layout section.
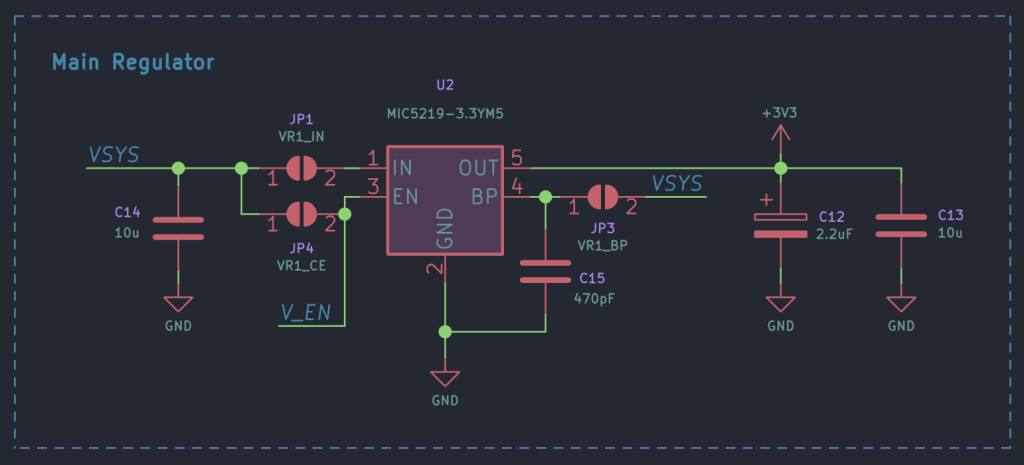
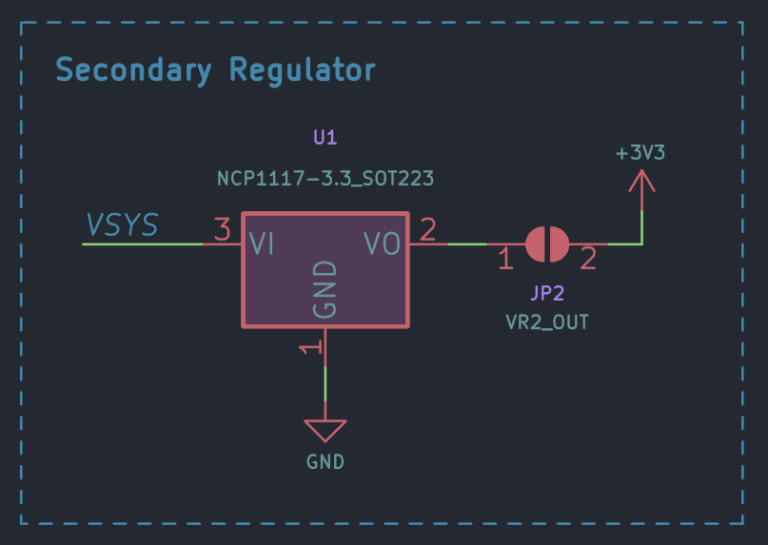
For power the main 3.3V regulator is an MIC5219-3.3YM5 from Microchip and then a secondary 3.3V regulator NCP1117-3.3 that you can use instead of the more expensive MIC5219 by make to the connection on the jumper. You can read more about it on article released by Circuitstate.
Picking of Ingredients to Complete the Mitayi
When asked about selection of parts and their procurements, Vishnu Mohanan shared his thought process behind it. For the company, the priority was cost, specs, availability and accessibility while selecting the parts. Thus, apart from RP2040, all other parts were chosen based on their local availability.
For purchasing passives, discrete, and connectors, he also provided the sites and vendors which are easily approachable (In India) such as-
- ComKey.in
- SUNROM Electronics
- Ktron
- Evelta Electronics
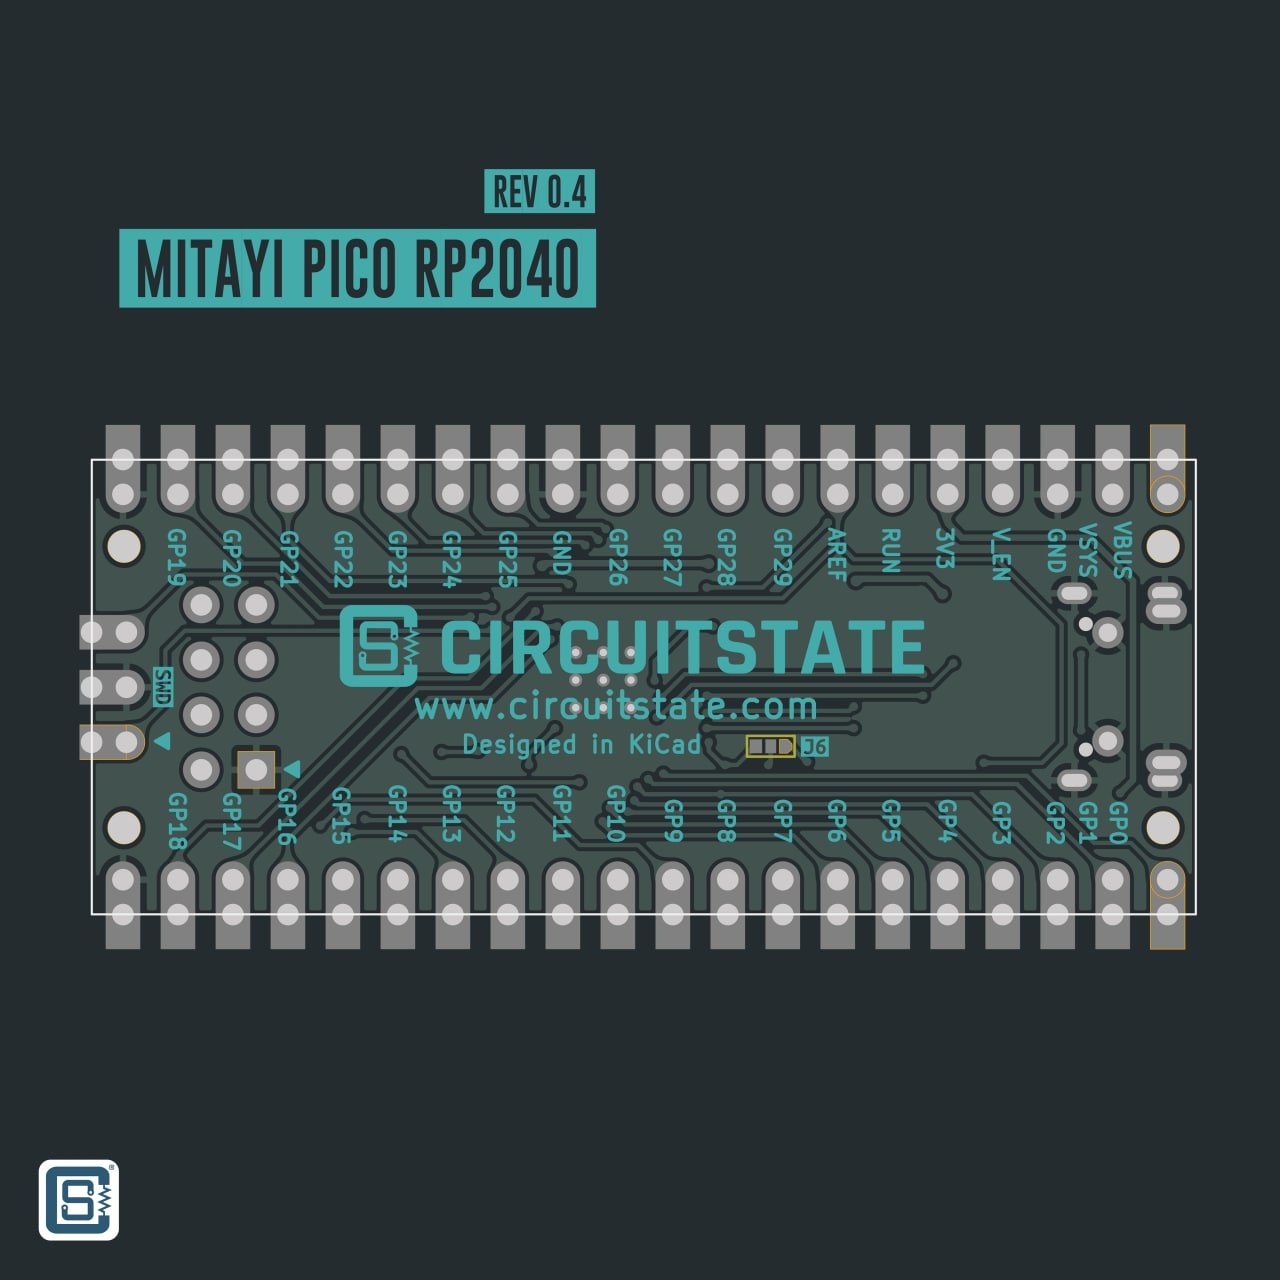
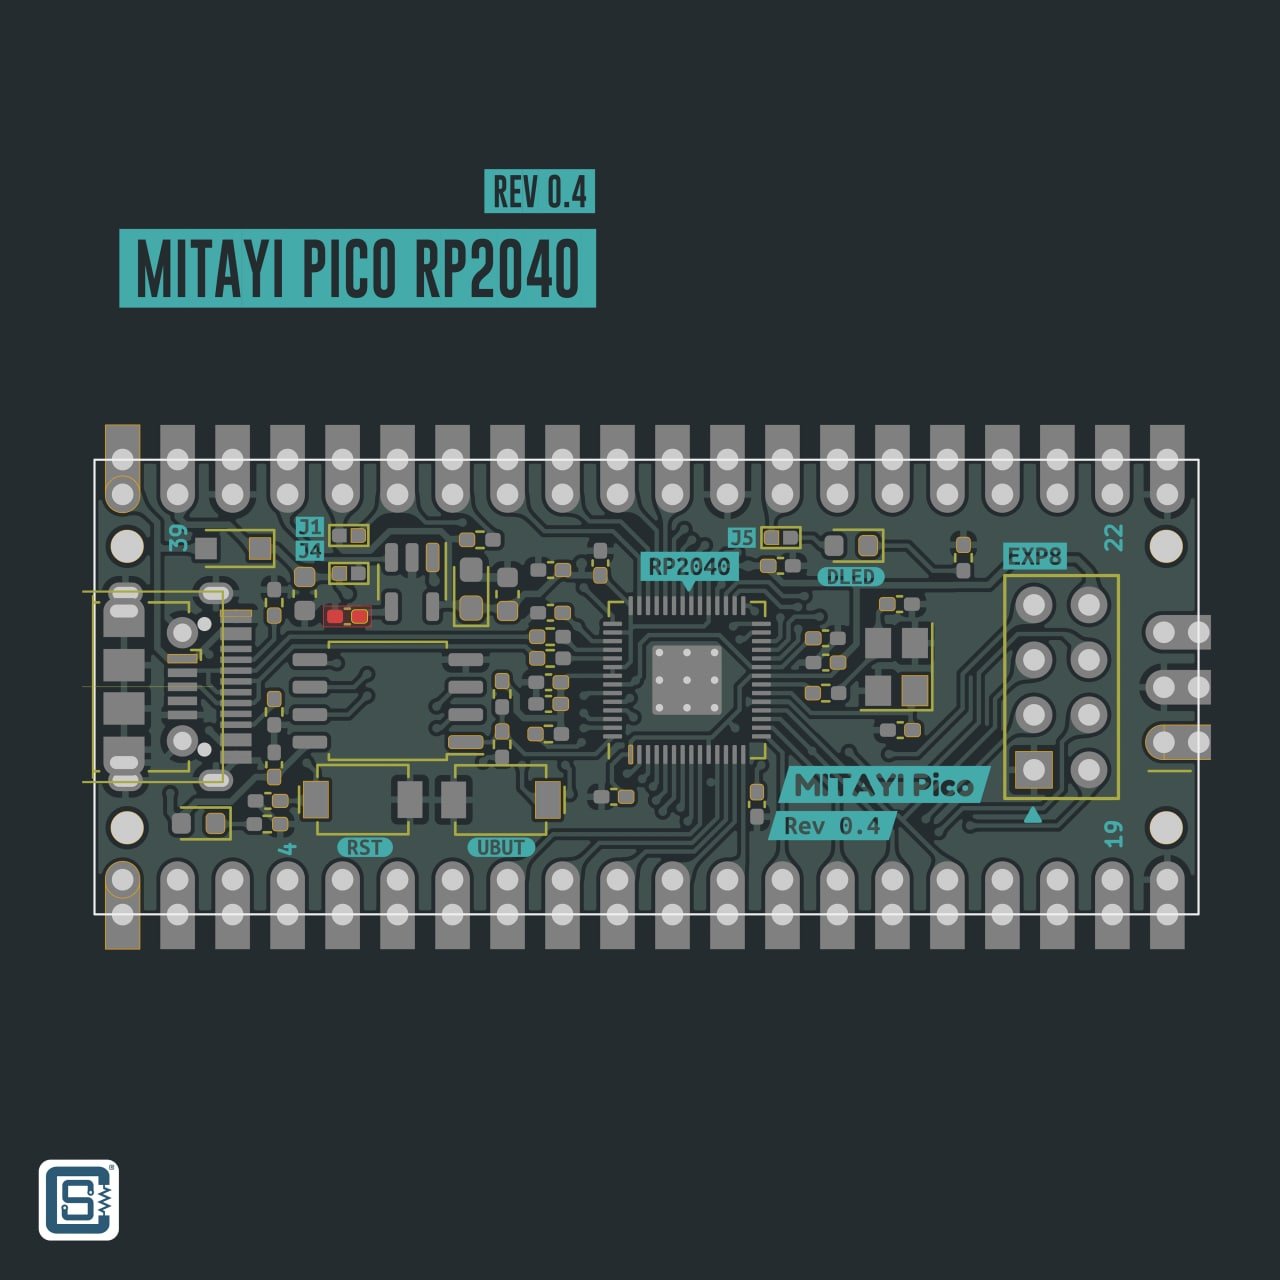
PCB Design
The PCB of the microcontroller development board is the foundation on which sits everything. It is 51x21mm sized, 1mm thick and 2 layered PCB. The location and orientation of the RP2040 is kept the same as the official Pico.
Due to its miniature size, almost precision is required in every detail on the board from vias to holes:
- The default track thickness and minimum clearance were 0.2 mm.
- All vias have the same size of 0.5mm/0.3mm (diameter/drill).
- For the pin headers with castellated holes, simply modify a 20-pin pin header footprint with a 2.54 mm pitch.
- Minimum hole size is 0.3mm.
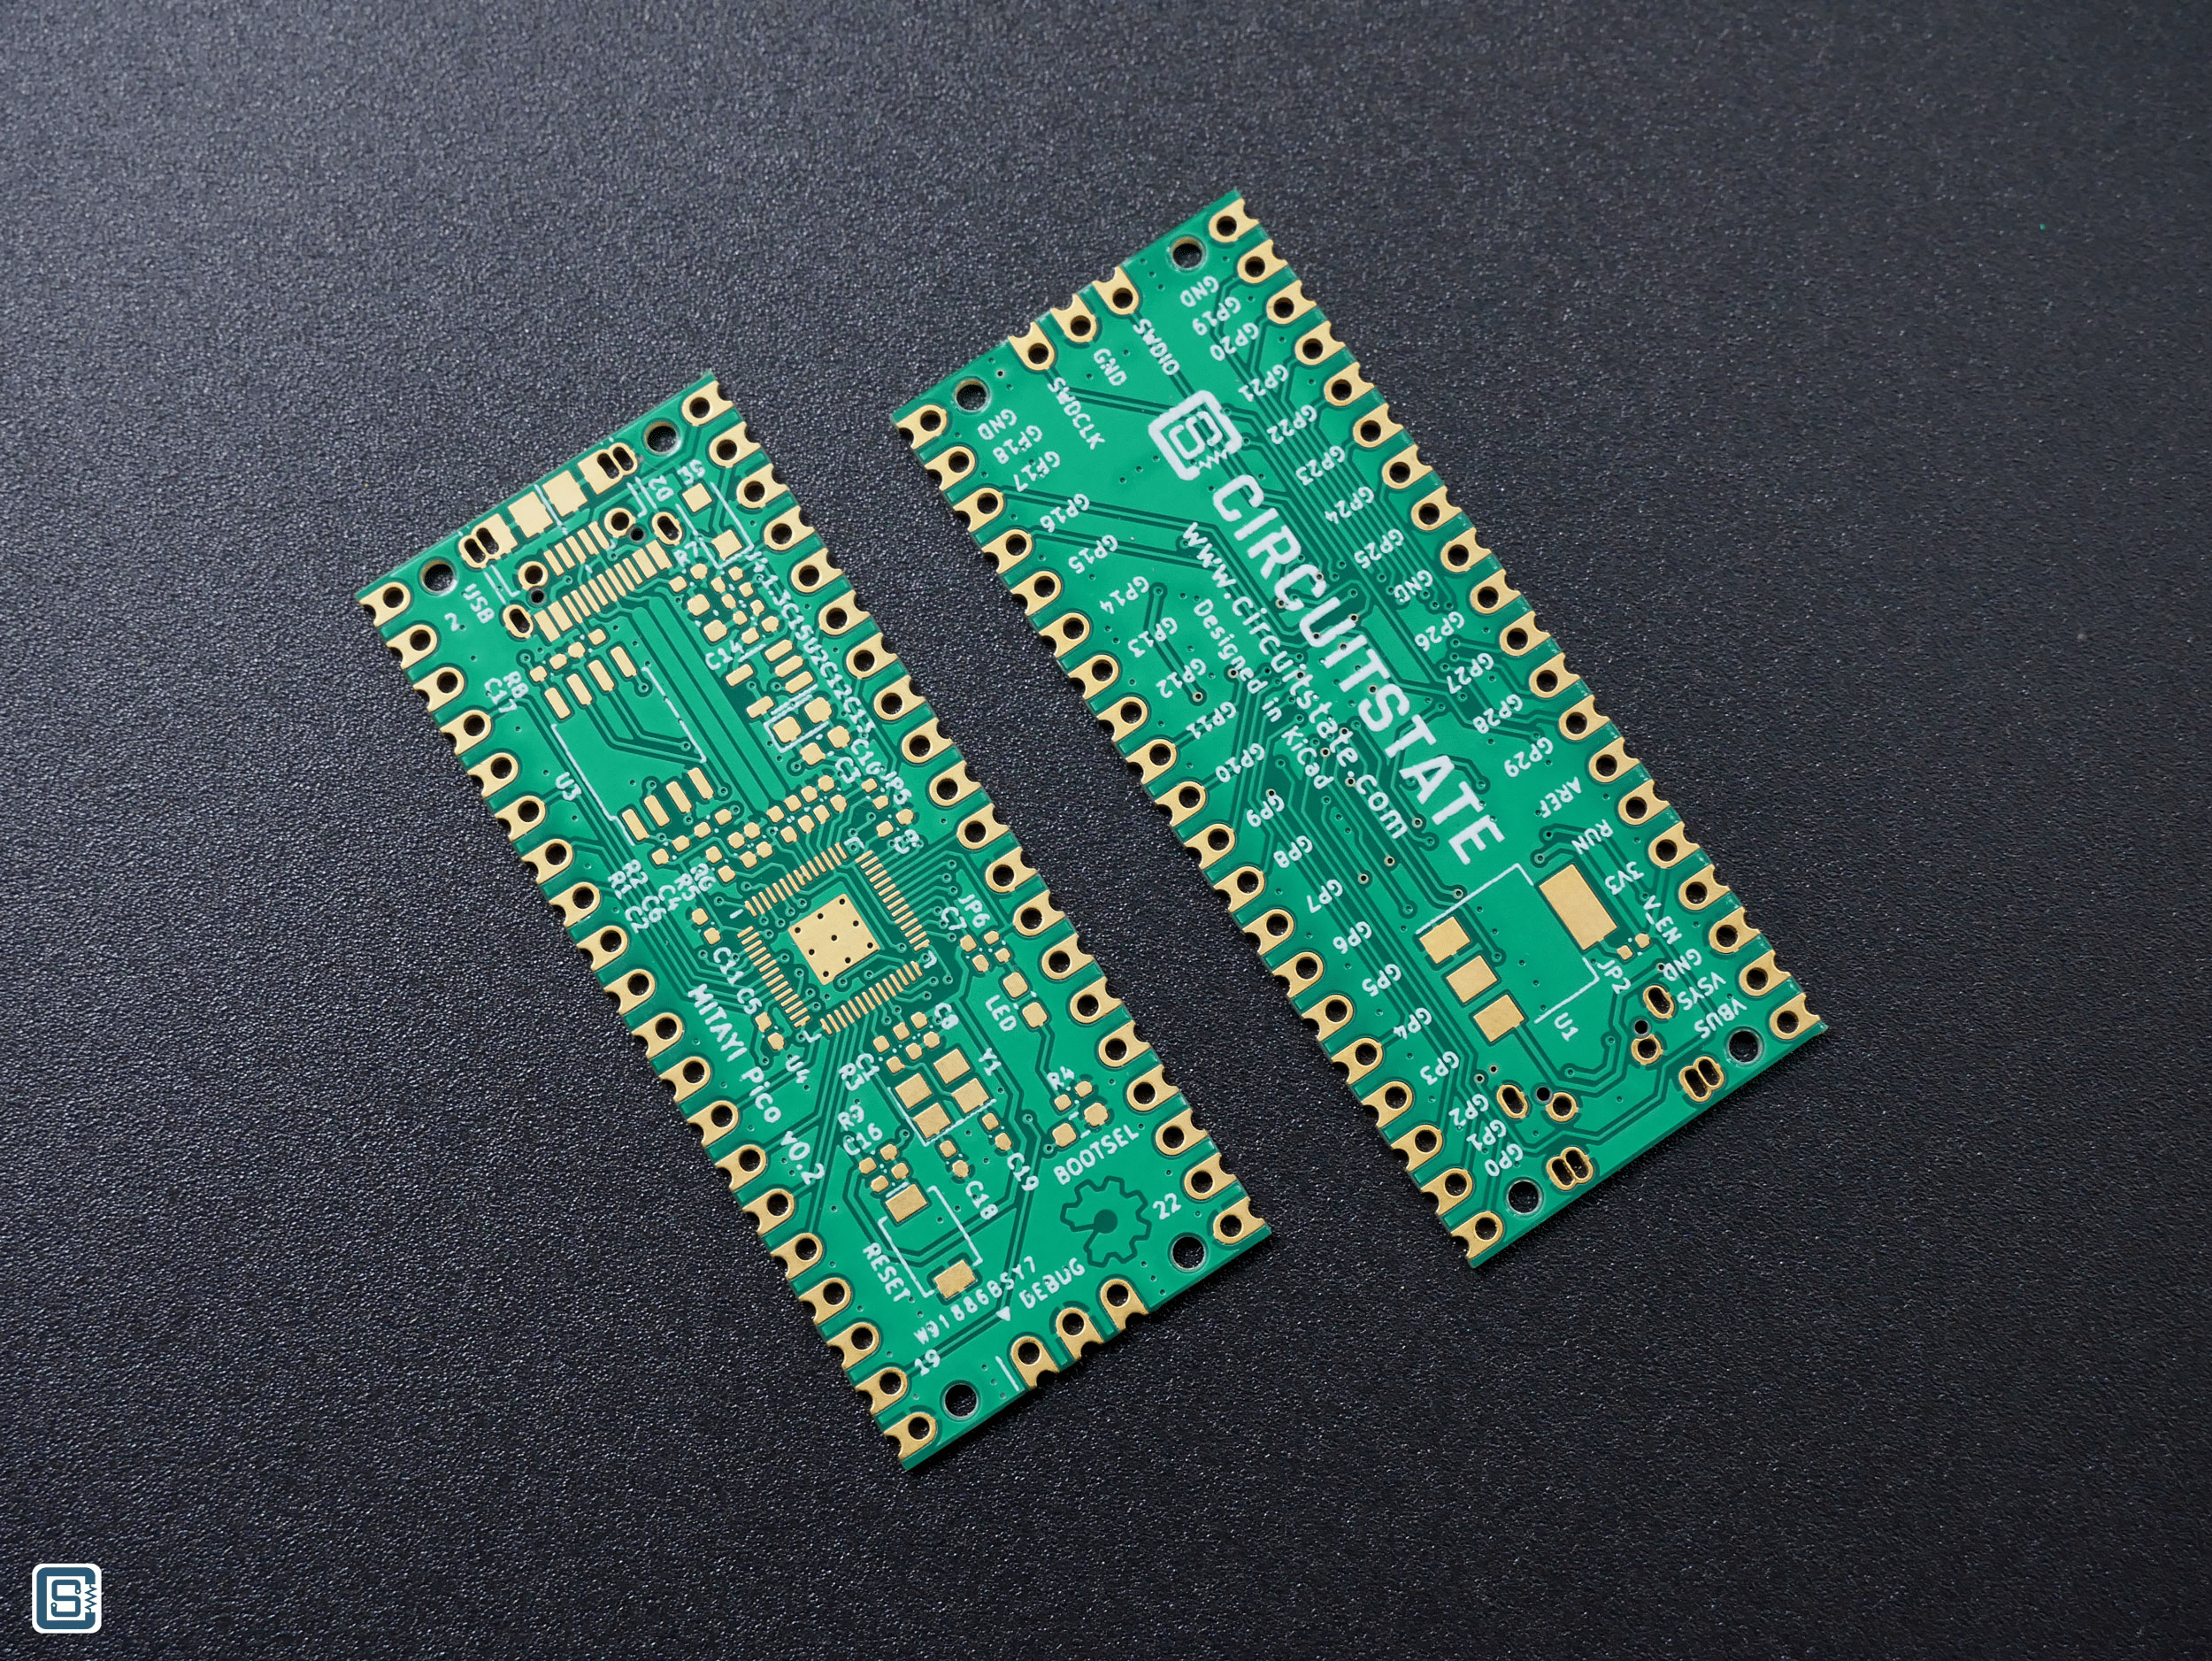
Mitayi PCB without components
We really love the stacking Type-C and Micro USB connectors. The footprints did not create any conflicts when placed on top of each other. Many can use this trick to find which port is compatible for your design just by doing one prototype. Though Vishnu was sceptical about type-C and micro USB stacking, the footprints and the routing, everything went pretty smooth and relatively easy.
Note : During assembly there might be some shorting of USB line because of the metal body of Type-C. To prevent this shortening of the USB line, Kapton tape should be placed on the micro USB footprint before placing the Type-C port. This might be struggle for production, but a neat trick if you are prototyping.
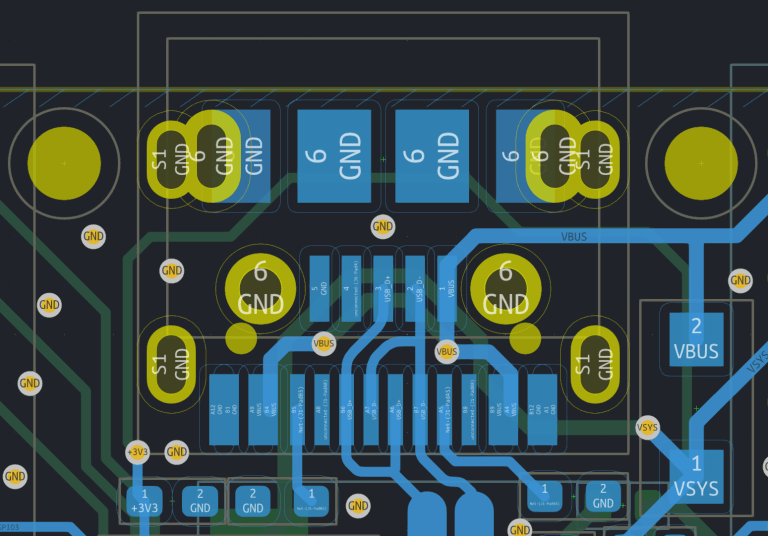
Stacked USB connector footprints
The PCB manufacturing was carried out by PCBWay and it cost the around US $55.00, Since the project was sponsored it was free of cost at the time of production.
Manual Assembly
Vishnu manually assembled the whole PCB rather than assembling them with the fabricator as it would become very expensive when went through further design changes.
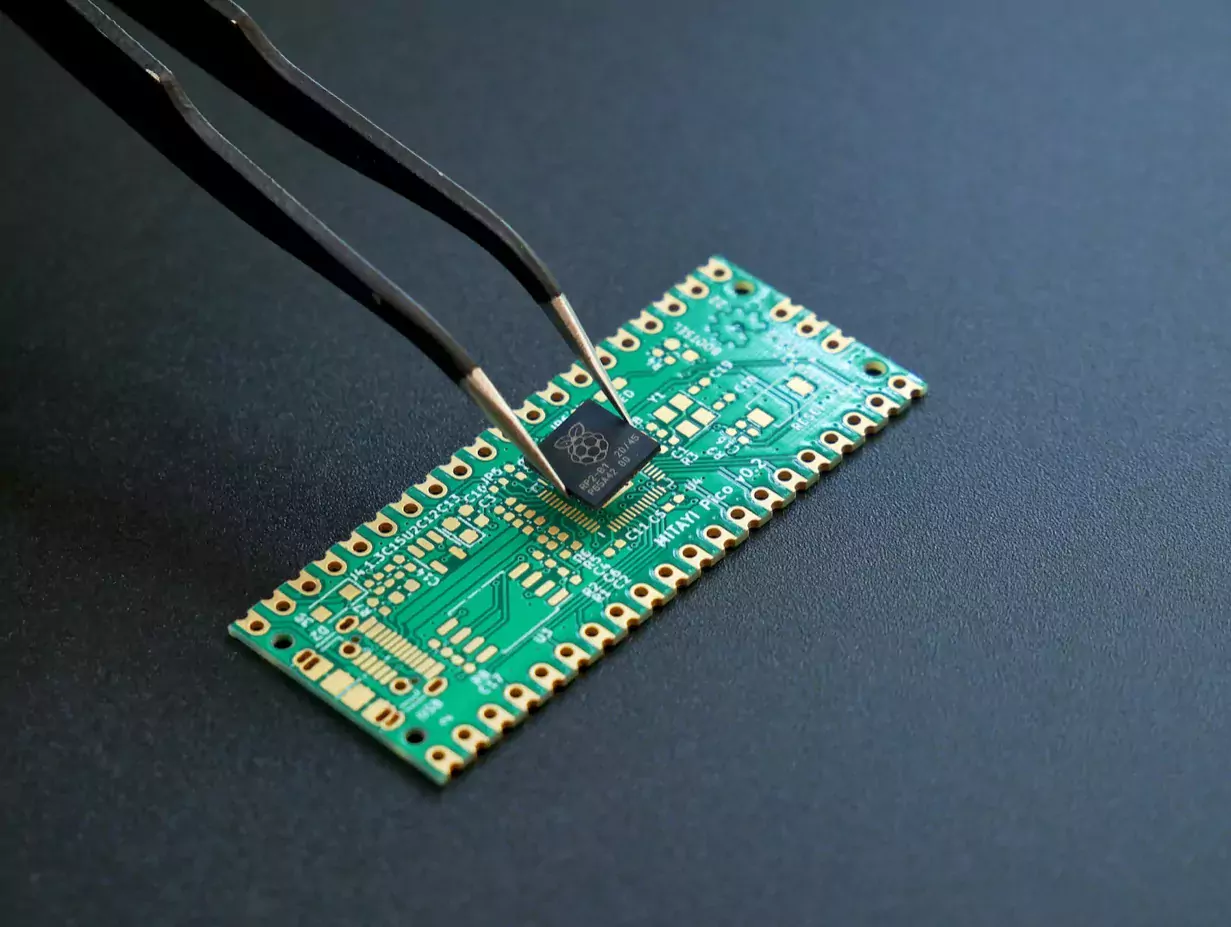
It’s nearly impossible to assemble all components on a PCB of such small size using a soldering iron due to the QFN package and 0402 components. Even steady hands could barely do it. Thus, a hot air or a reflow plate is mandatory.
The major challenge was to solder and fix small components on the PCB, because most of the components were dislocated from their footprints during the hot plate reflow process.
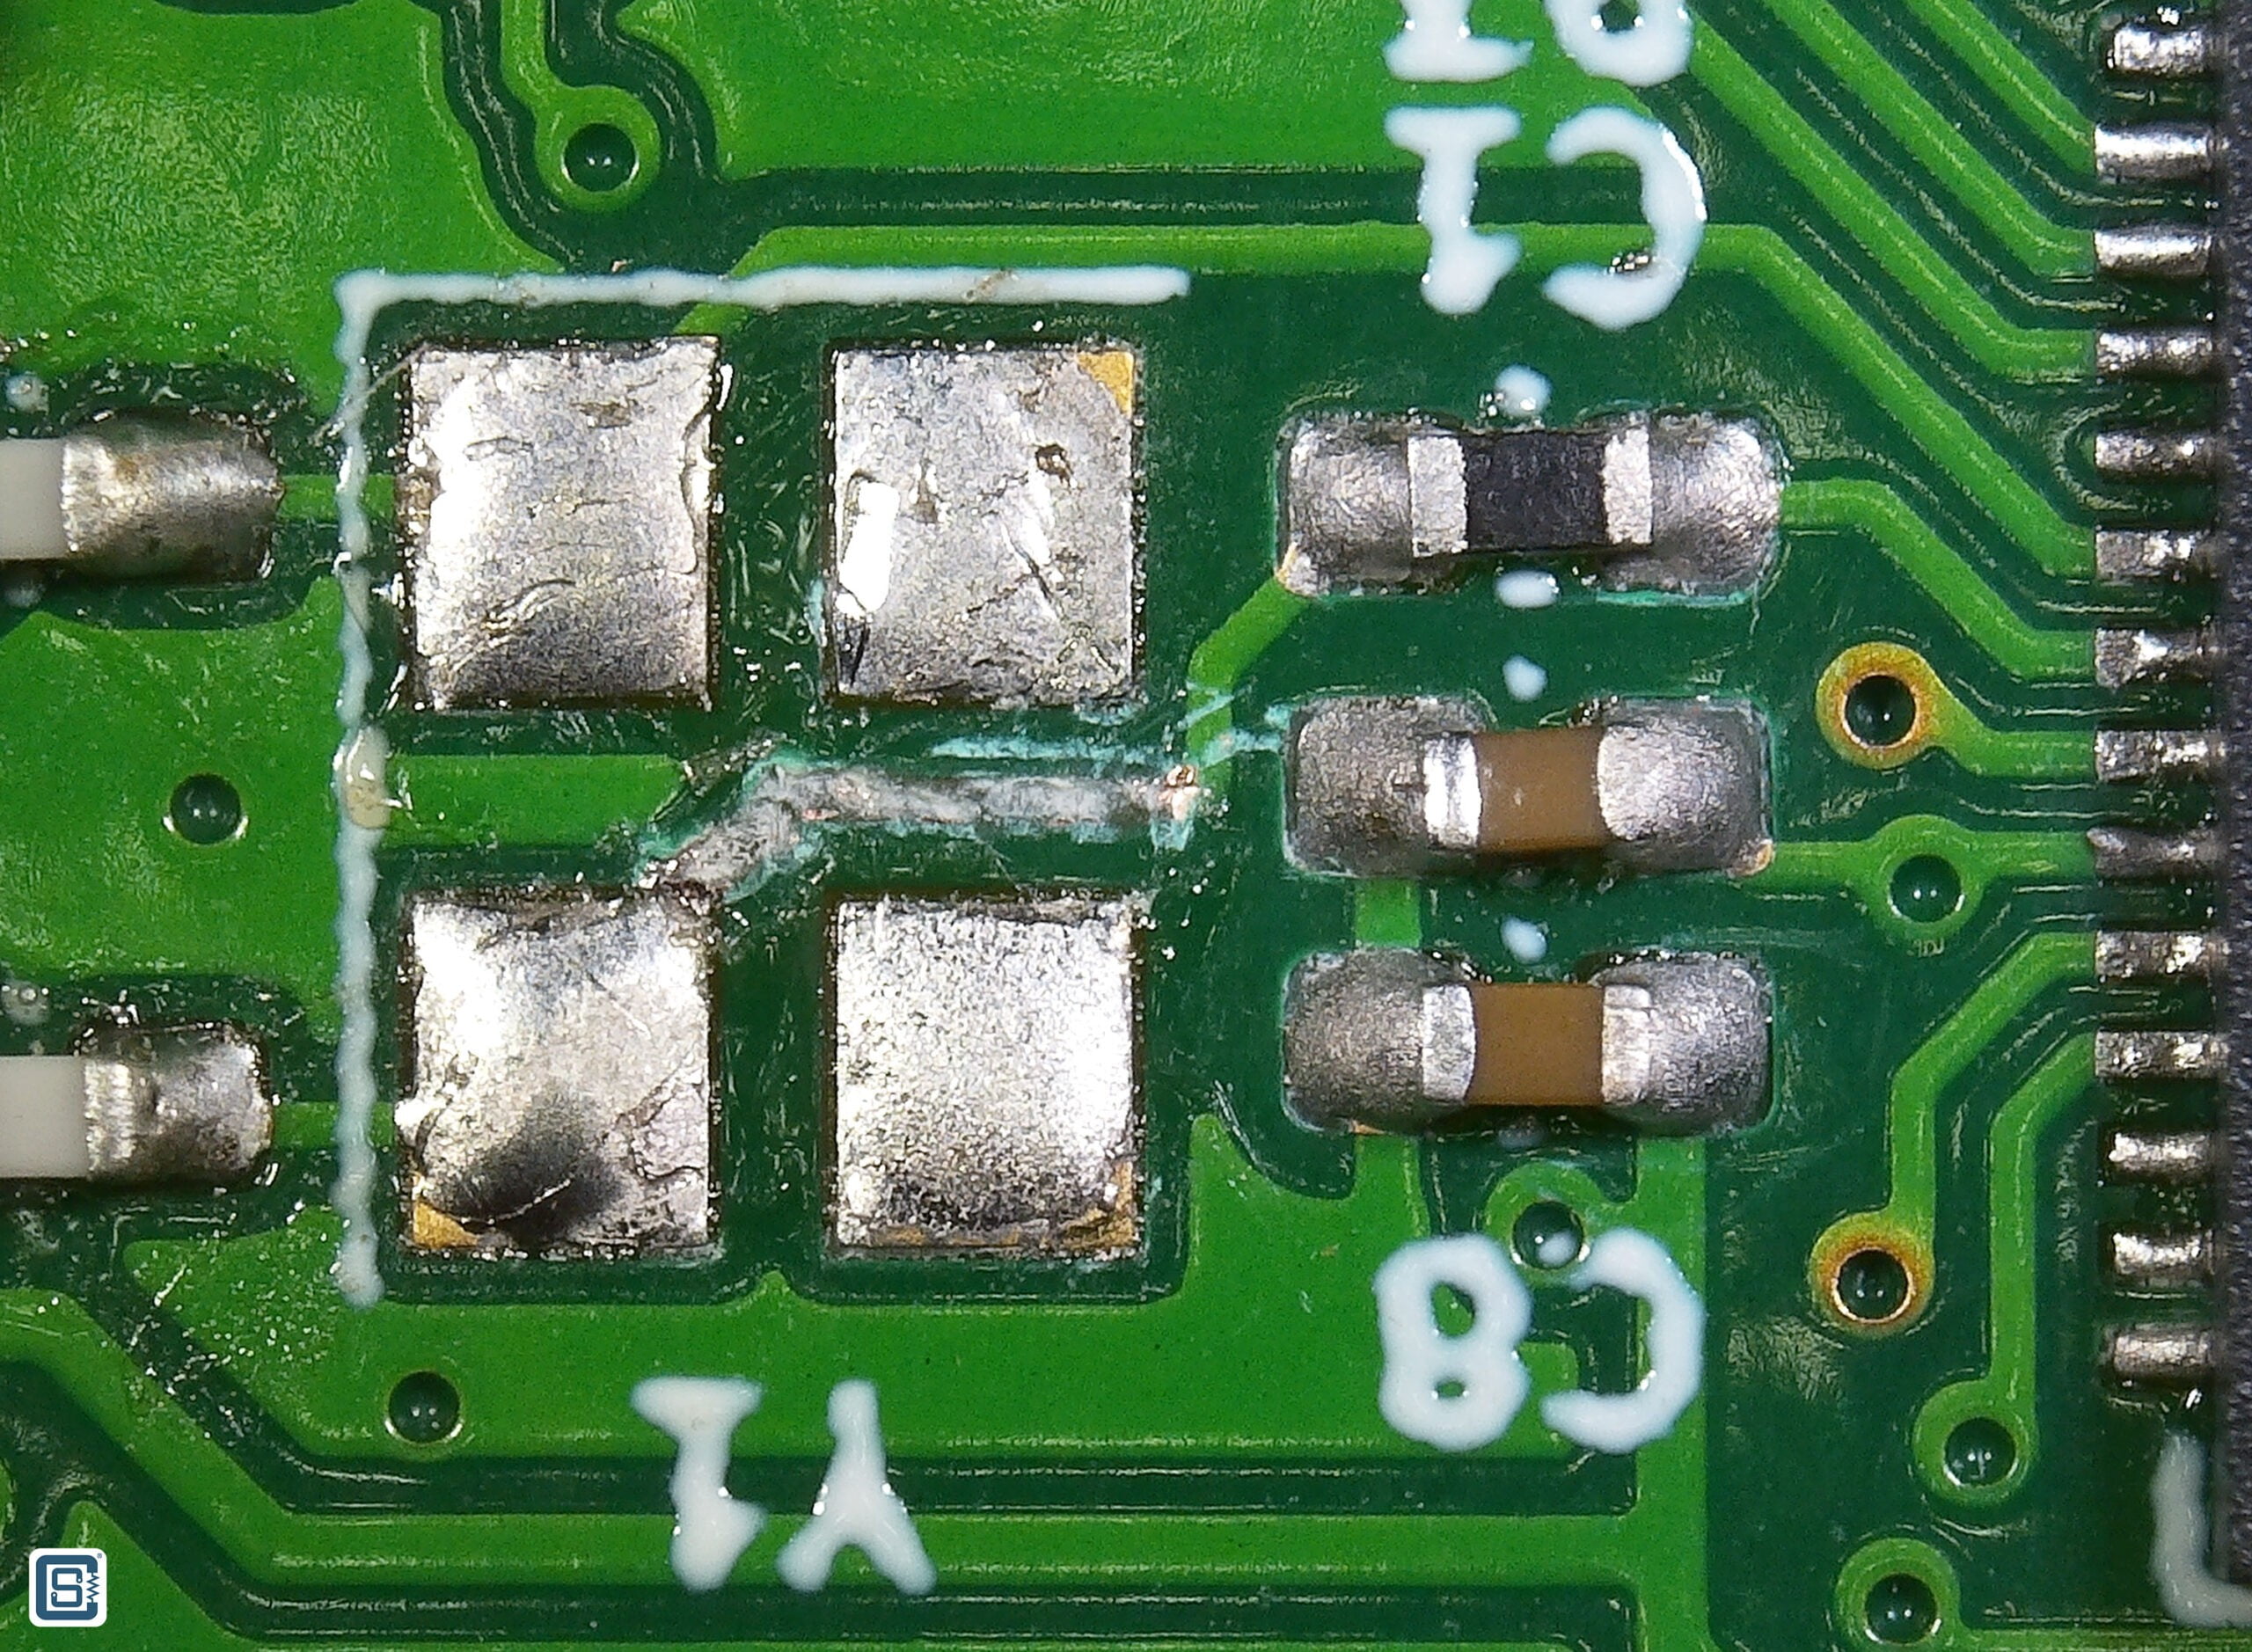

Issues during assembly
After tackling all the challenges, the manual assembly of the PCB was completed and post testing, it functioned satisfactorily as we heard from the Vishnu.
The Mitayi with the Sweet Sensation on Electronic Palate
Initiative like this from Circuitstate Electronics help in constantly upgrading the technology to make our electronics world more inclusive and accessible to all. Mitayi series is one such prominent example and the fact that the Mitayi Pico is just their first product in line of many more to come leaves a sweetening satisfaction worth of a Mitayi (candy) in every learner’s electronic palate.
As we speak there are lots of design changes going on with Mityai Pico, so watch out for more updates!
A huge thanks to Vishnu Mohanan for providing all the images that we used in this article.


Leave a comment